Skip to content

How to Remove Eye Bags in Photoshop

  • by
How to Remove Eye Bags in Photoshop

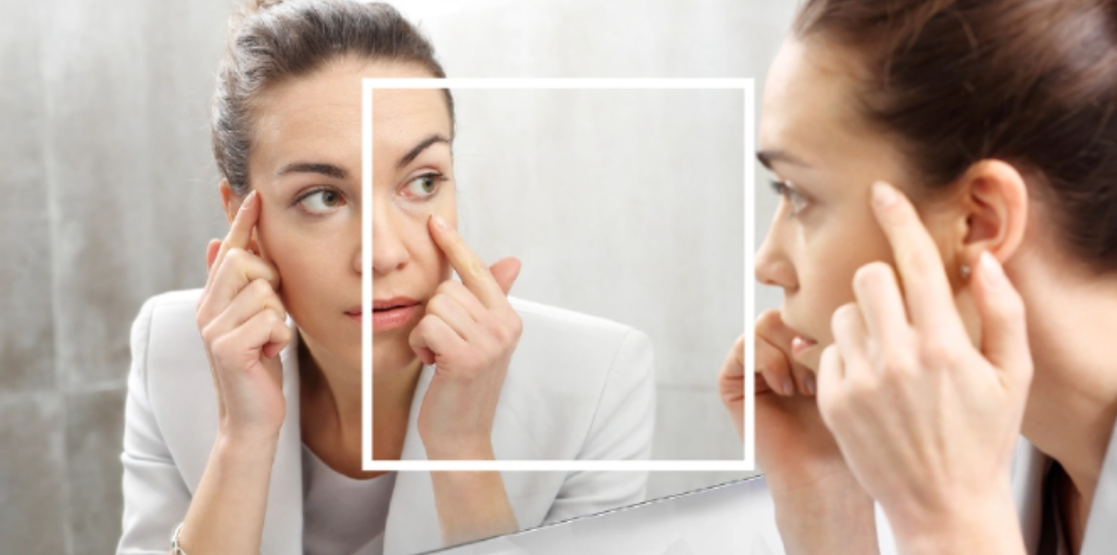
How to Remove Eye Bags in Photoshop: We know that we can’t hold time but can preserve memories with photos. So last week, Lisa went on a fall picnic with friends and captured numerous Fall Photoshoots to create a memory. But unfortunately, when she checked the photos, she found her photos focused on the eye bags, which upset her since it ruined her memory. And who wants to avoid having a beautiful memory?

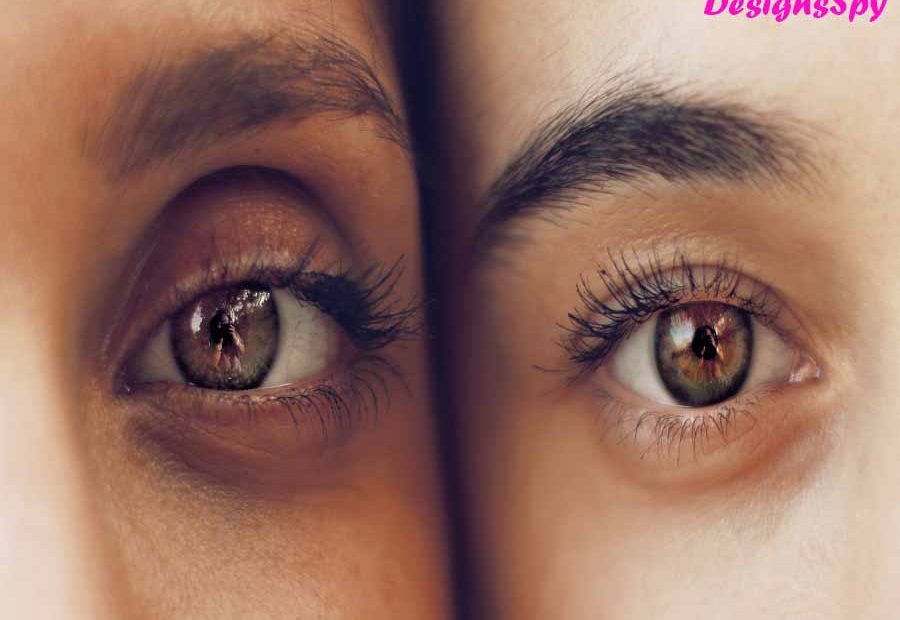
We can’t deny having eye bags in our pictures if we own them in our practical life. But unfortunately, sometimes, it appears in photos even though we don’t have it in real life. Since annoying eye bags are the shortcomings of our pictures and selfies, we should eliminate them from memory.

Are you facing the same problem as Lisa facing? Are you looking for a crystal clear solution for removing eye bags in photoshop? You are scrolling on the accurate page to get the remedy in photos. In this blog, I’m on the verge of discussing how to remove eye bags in photoshop.

How to Remove Eye Bags in Photoshop

What Is an Eye Bag in Photos?

‘Eye Bags’ defines the tired and sloppy skin constructed like a pouch under the eye.  As a result of eye bags, the chubby pads go beneath and refill the space that causes the eyelids to appear puffed and swollen. 

There are many medical conditions to have an eye bag in real life that you can remove through medical treatment.  But it is time-consuming.  When you need a photo in such a situation, you can’t wait for that long time to create a beautiful memory.  That’s why there is an Eye bag removal service for you to make the photo memorable by removing the Eye bag. 

Learn More: How to Remove a Color in GIMP

How to Remove Eye Bags in Photoshop

Photoshop is like a blessing for the photo editing process; that can aid you in fixing all the photo’s imperfections, Changing Skin Color in Photoshop and making it impressive. It supports you to shine with beauty in an ordinary image.

Eye bags are one of the imperfection issues in a photo that can take place for medical issues or photography style. Unfortunately, it can occur due to inconvenient light configuration during photography. Another reason is that the light arrives from the top and creates a harsh shadow underneath the eyes. 

Whatever the reason, we can eliminate it by utilizing retouching in photoshop. However, we should consider the following things before we jump to execute the technique in photoshop to remove the eyes bags : 

  • We should preserve the true-to-life look. 
  • We should consider skin tone and the wrinkles present in the photo.
  • We must execute a different process for males and females. 
  • Evaluate the final result properly. 

How to Remove Eye Bags in Photoshop

Learn More: Simple One Line Face Drawing

How to Remove Eye Bags in Photoshop for Female

There is a common rule- “Ladies first.” That’s why I will first show the eye bag removal process for the female photo. Let’s execute step by step for How to Remove Eye Bags in Photoshop for Female

  1. Unplug the photo in photoshop and replicate the layer
  2. Rename the layer. 
  3. Pick the ‘Patch Tool’ and keep its mode normal with diffusion 5. 
  4. Holding the Alt key (PC) or option key (Mac), move up the mouse to zoom and catch the imperfections. 
  5. Choose a smaller zone beneath the eyes and drop a bright area by dragging. 
  6. Continue the process for all the eye bags. 
  7. You will follow the same process to fix the nose and lips. 
  8. Now to make the picture perfect, fix the shades under the eyes. For that, create another layer and rename it. 
  9. Click on the new layer and set the mood as Lighten.
  10. Choose the Clone Stamp tool and pick a bright area as a sample for the tone. 
  11. Then brush over the shaded part of the eyes. Be careful to brush over. Don’t brush over other parts except for the shaded part. 
  12. Zoom in and continue the process until you get the perfect result in removing shade.
  13. Combine layers of eye bags and dark eyeshadow by holding Ctrl+G (PC) or command+G (Mac) or select Group from Layers by right-clicking on the mouse and clicking ok on the pop-up. 
  14. Add a natural look depending on the photo resolution by setting the Opacity to 60-70%. 

Going through the above steps, we have dismissed the eyebags from the photo. If you want to avoid adjusting the skin tone and get an authentic result, you can turn the photo black and white. You can check out How To Make An Image Black and White if you desire to know the process. 

Learn More: Plain Background Colors

How to Remove Eye Bags in Photoshop for Male

Now it’s the turn of the male photo to remove the eye bags. Again, for males, we will do the same steps we followed for a female except for the application of Opacity. Here we will apply less Opacity because male looks demand a harsh appearance, whereas female faces require a smooth look. Nevertheless, few mannish faces are squeaky-clean, and we will gauge them as anomalies. Let’s count the steps How to Remove Eye Bags in Photoshop for Male

  1. As mentioned earlier, follow the same instructions to fix eye bags. 
  2. Decrease the Opacity to visualize a few imperfections because the male face contains more adulterants than the female face. Try to keep 50% to 65% according to different resolution photos. 
  3. Execute a little bit of change in the shadow under the eye, but not much. 
  4. Combining both layers and decreasing the Opacity by 25% will make it authentic enough. 

We have completed our journey to remove eye bags under the eye for male and female photos. 

Learn More: Travellers Photography Tips, Ideas, Places and importance

Terminate Eye Bags on iPhone

Eyebags can destroy the beauty of a photo. So, photographers use the photoshop app to fix it, but what if you want to fix it instantly using a phone? Yes, in this part of the blog, I will show you how to remove the eye bags from your eyes employing your iPhone. So, let’s start the process: 

  1. We will employ Facetune to execute the process. 
  2. Open the app and load the photo. 
  3. Look at the underpart left corner and find the Retouch option to tap it. 
  4. Pick Conceal from the toolbar and zoom in or enlarge to check the imperfection. 
  5. Swipe over the eye bags to erase them easily. 
  6.  You can preview the portrait after each modification. 
  7. When you are pleased with the result, Save it on your phone. 

    Learn More: 15 Product Photography Props

Remove The Eye Bag Using Android Phone

Download and install the YouCam Makeup from the play store to remove the eye bags using your android phone at hand. It is the best app ever for photo editing, and it offers numerous retouching options. So let’s dive into the steps to remove the eye bags from the photo. 

  1. Open the app and select the photo you want to work on. 
  2. Select the retouch option from the bottom. 
  3. After that, steer to Eye Bag, and a slider bar will appear. 
  4. Shift the bar right to left until you get the perfect result. 
  5. Finally, when you get the expected result, save it.

Why Should You Remove Eye Bags From Photos?

The eyes are the windowpane to the spirit that speaks out when our lips fail due to fear. In the case of photography, the photo becomes more alluring when the subject’s eyes contact the viewer’s eyes and beget the message of the photo. 

So, we can say that the eyes are the foremost thing to tempt the viewer. On the other hand, puffy eyes or eyes with bags fail to charge attention and devastate the photo’s beauty. But, a good photo retouching service can distinguish between an engaging and regular appearance. 

Hence, photographers prefer to employ the eye bag removal service so that they can generate an appealing photo. They remove the puffiness and turn it into a good-looking one using the service. But, of course, you can also execute the procedure and create an outstanding photo by going through the blog. Unfortunately, as a neophyte, you may not create an acceptable result. So, you can drop a kite with experts like DesignsSpy to get a satisfactory result.

In this blog, I have drawn out the whole picture on how to remove eye bags in photoshop. I also cast shadows on doing the same job using both iPhones and Android phones.  So, I believe you won’t experience any more pictures with eyebags. By the way, in Korean fashion, an eye bag is stylish. So, you can keep it to exist for a few images if you want to go with that trend.

Leave a Reply

Your email address will not be published. Required fields are marked *